
Lab note · Nov 3, 2026
A character box, start to (almost) finish: every mistake and the rule it left us
One round storage box with a twist-on lid and a screw-on ball on top. It took a week, eleven versions, a lid nobody could open, a stud that snapped, and a lid that got stuck. Here is all of it.
Okay, what did we learn? A lot. Every mistake below left us a rule we use on every print now.
- SizeAbout a grapefruit, holds ~2 cups
- Versionsv1 to v7.4 in eight days
- StatusFinal lid printing now
In short
- We wanted a round box with a lid that twists on like a jar, stays on upside down, and still opens with one hand.
- It took nine mistakes to get there. Each one is below, with the one-line rule it taught us.
- The biggest lessons: round lids twist instead of snapping, test fits at full size, every lid needs a finger grip, and threads print lying down.
- The final lid is printing now.
The question
A character box is a round storage box shaped like a character’s head, printed in one color per piece, with no supports and no glue. The lid has to stay on upside down and still come off with one hand, and the ball on top has to screw on by hand. How hard can that be?
The goal
A round head that is really a box: a bowl at the bottom, a lid on top, and a short stalk on the lid with a ball that screws on.
It is 112 × 102 × 100 mm, about the size of a grapefruit (140 mm tall with the stalk and ball), and holds 446 cm³: a little under two cups.
We built every piece in code, with Python and the manifold3d geometry library (opens in a new tab), not in a CAD program. The texture we wanted is a math surface no CAD feature makes.
Every piece prints in one color, with no supports and no glue.
The texture: math, not a picture
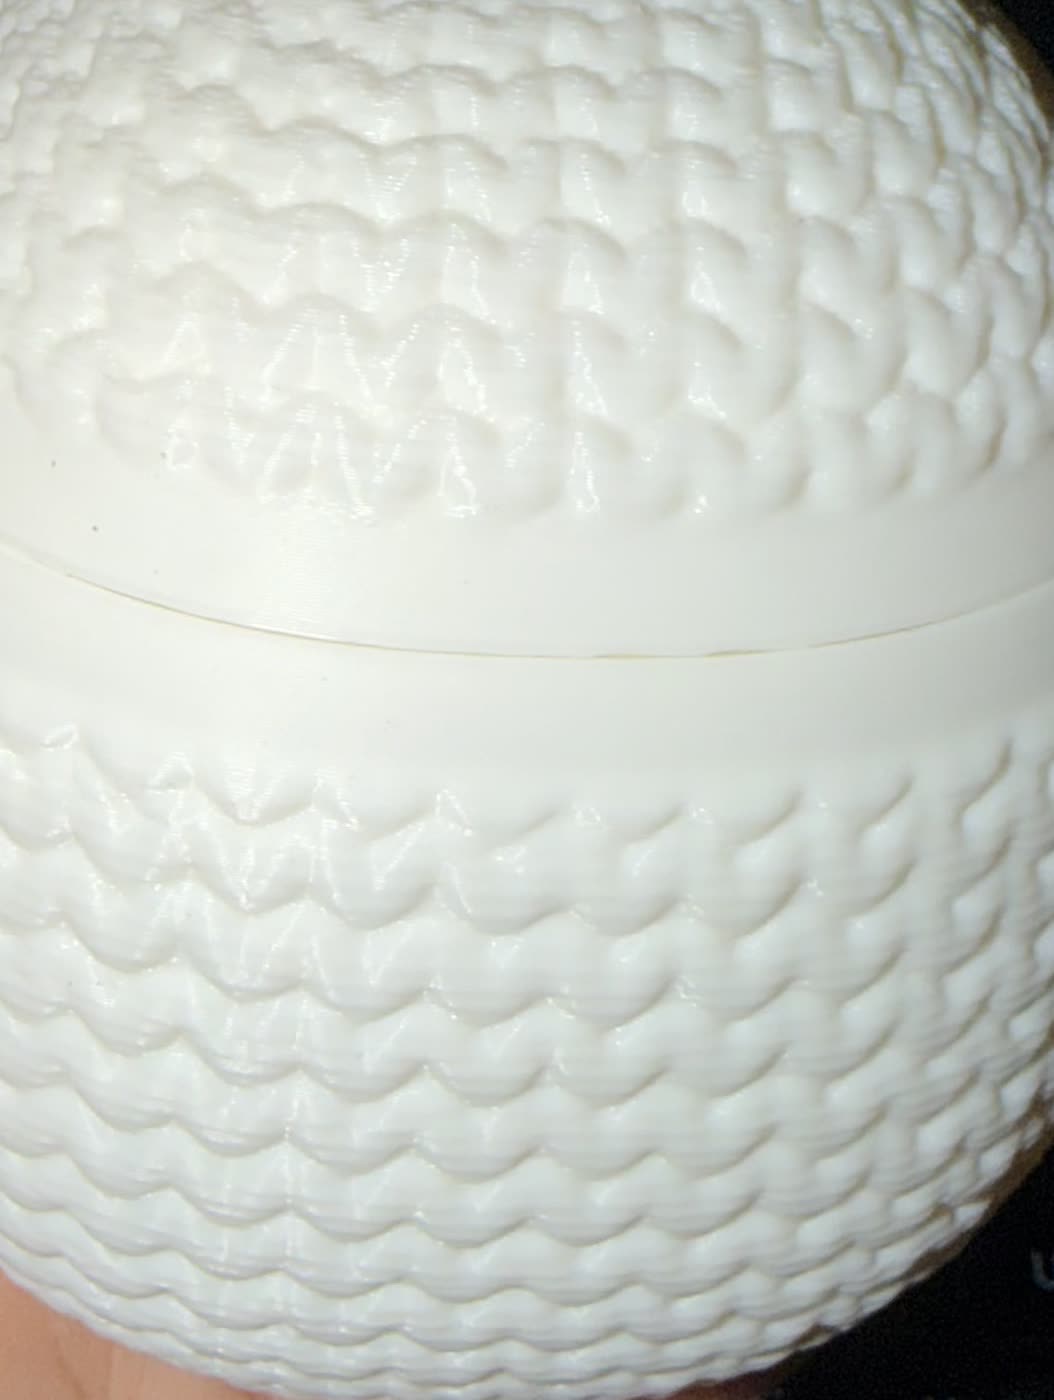
We wanted the whole head to look and feel crocheted. Wrapping a picture of knitting around a ball stretches it and leaves a seam, so a formula gives the height of the surface at every point instead.
Each stitch is a V, 7 mm wide and 5.8 mm tall (about the size of a pencil eraser), standing up to 1.3 mm proud: about the thickness of a dime.
The texture fades out at the foot, so the first layers stick to the plate, and at the very top, where the rows get too small. Since v7 the stitches run right across the seam, so a locked lid lines up with the bowl.
How the stitch is built is its own short note: How we put a knit texture on a print. You can also play with the crochet texture in our texture library.
Mistake 1: a lid nobody could open
Our first proper lid (v2, Oct 31) snapped on with small ridges all the way round. It held so well that nobody could get it off, even pulling on the screwed-on ball.
Softer ridges on a test ring, down to 0.25 mm (about two and a half sheets of printer paper), still needed two fingers jammed inside to pry it off.
A snap works by bending a wall out of the way. A closed circle can’t bend, so the whole ring has to stretch at once. The full story is in The container I made too well.
The twist lock, and a test with dots
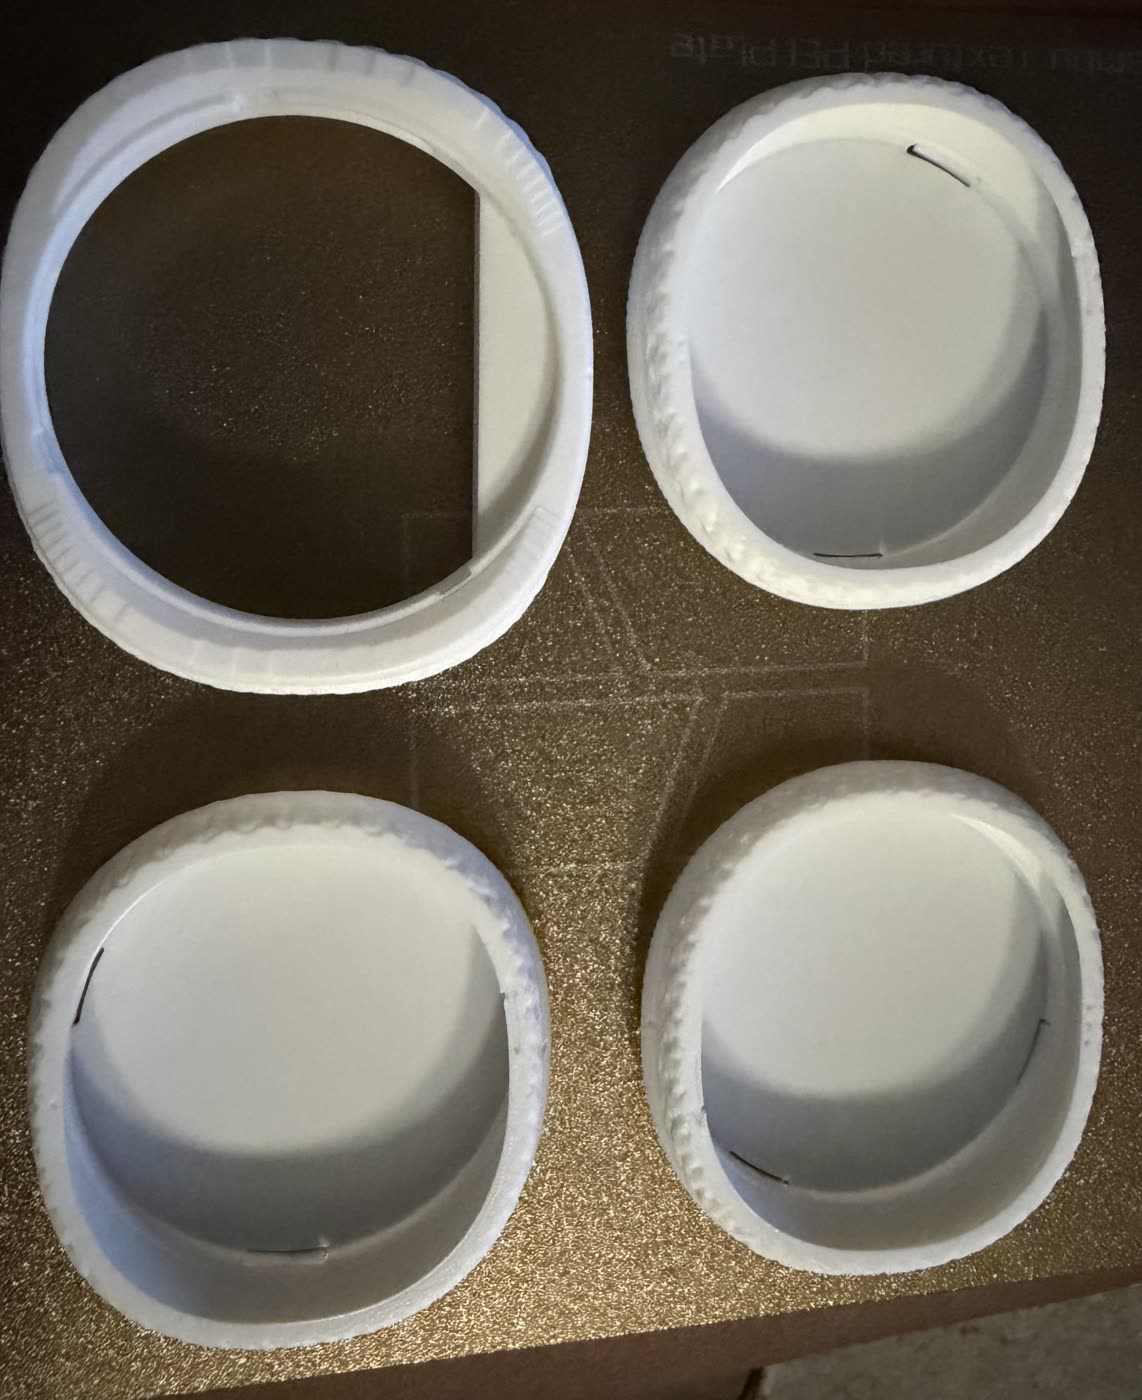
So the lid became a twist lock, like a jar. Three lugs (small tabs) on the lid drop into three slots in the bowl. A 35° turn, about a tenth of a full turn, slides them under the bowl’s overhangs, and a tiny spring arm clicks at the end.
The lugs are spaced unevenly (105°, 155°, and 100° apart), so the lid only goes on one way.
Before printing a whole box, we printed one bowl ring and three thin lid trays with a soft, medium, and firm click. Each tray is marked with dots on its back edge, so we can always tell them apart.
All three twisted on and off. We picked the firmest.
| Dots | How far the click reaches | About | Result |
|---|---|---|---|
| • | 0.15 mm | 1½ sheets of paper | Soft click |
| •• | 0.30 mm | 3 sheets | Medium click |
| ••• | 0.45 mm | 4½ sheets | Firmest: the winner |
Mistake 2: a locked lid that pulled straight out
v5 (blue) opened beautifully. Then we tugged on the stalk while it was locked, and the lid came straight out.
The lugs sat on the same spring arms as the click. The roofs they hook under are sloped at 45°, so a pull pressed each lug inward, the arm bent, and the lug slipped out. By our model that takes only about 25 N per lug: the pull of lifting a 2.5 kg (5.5 lb) bag.
The fix: the lugs stand on solid plastic, and the click moved to its own small arm that holds nothing.
Mistake 3: a lid that wouldn’t go on
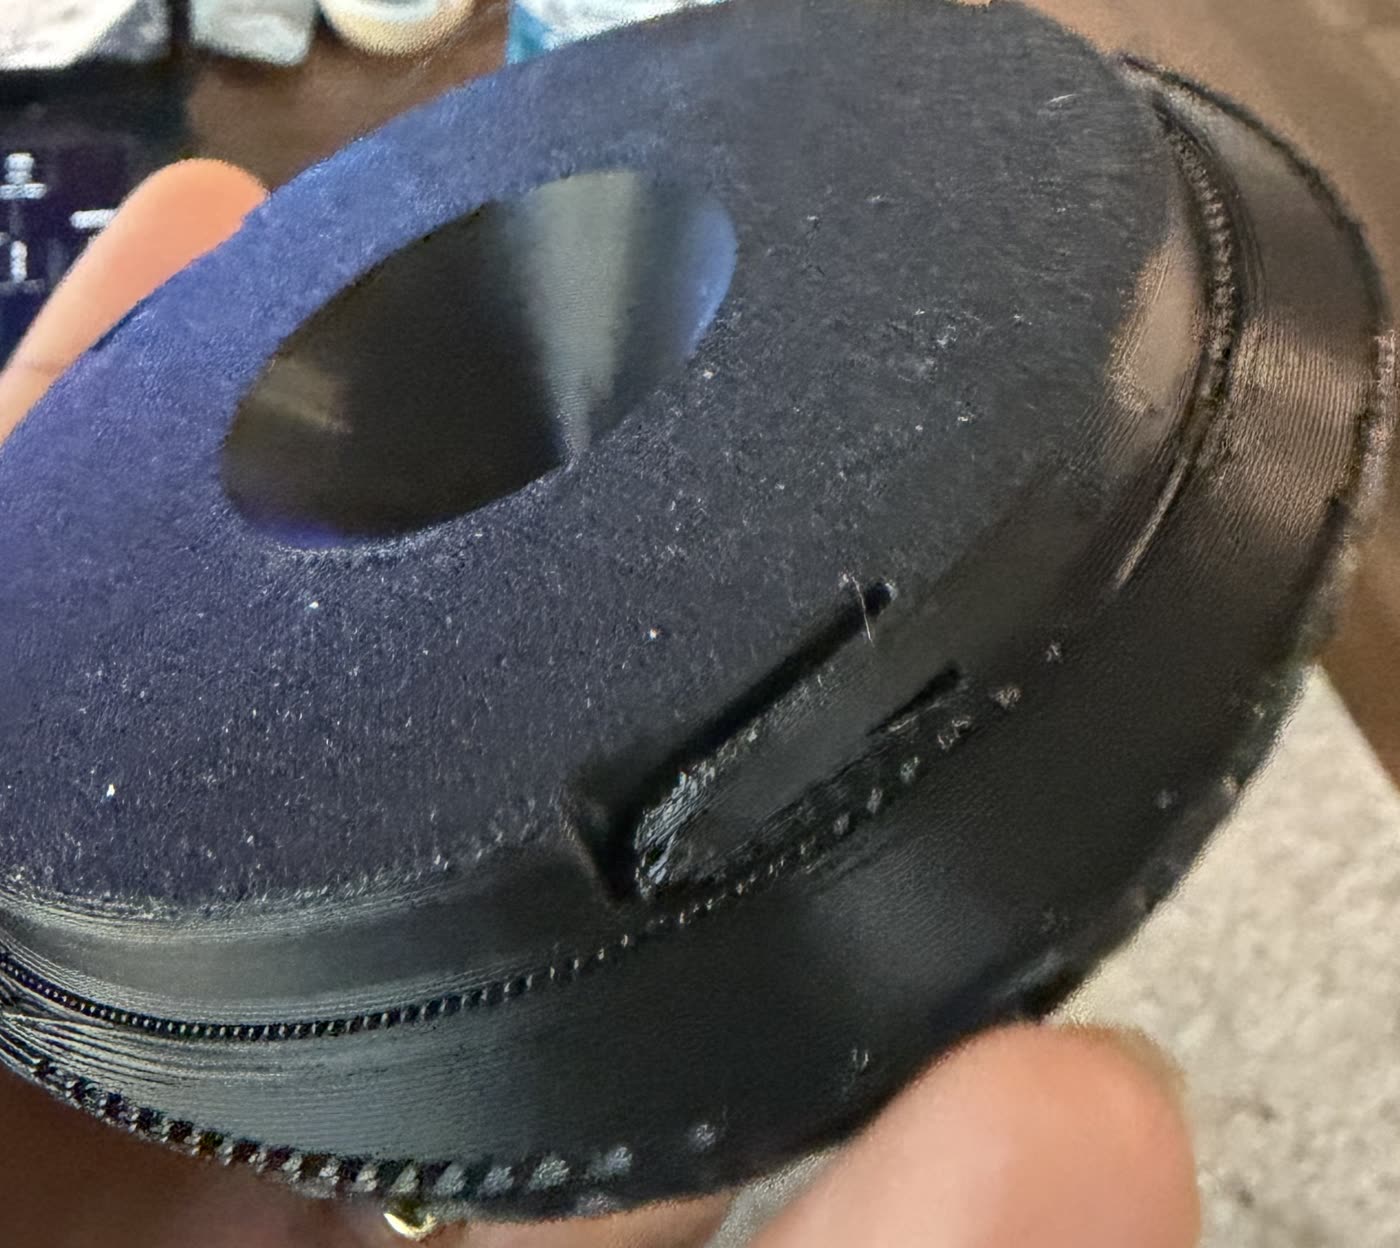
v6 (black) had solid lugs, and would not go on at all. It sat tilted, half in.
The lid rested on a flat 1.5 mm step at the seam. The lid prints upside down, so that step was a flat overhang with nothing under it. It came out as a beaded ring of blobs (we call it the zipper), right where the lid enters the bowl. That was most likely the main culprit.
The slots also kept their old 0.25 mm gap per side, but now nothing could flex to forgive a fat print.
Mistake 4: test rings knocked off the plate
v7 cut the bowl and lid from one head with a single 50° cone, so the seam is flush: a 0.03 mm step, less than a third of a sheet of paper, too small to feel with a fingernail.
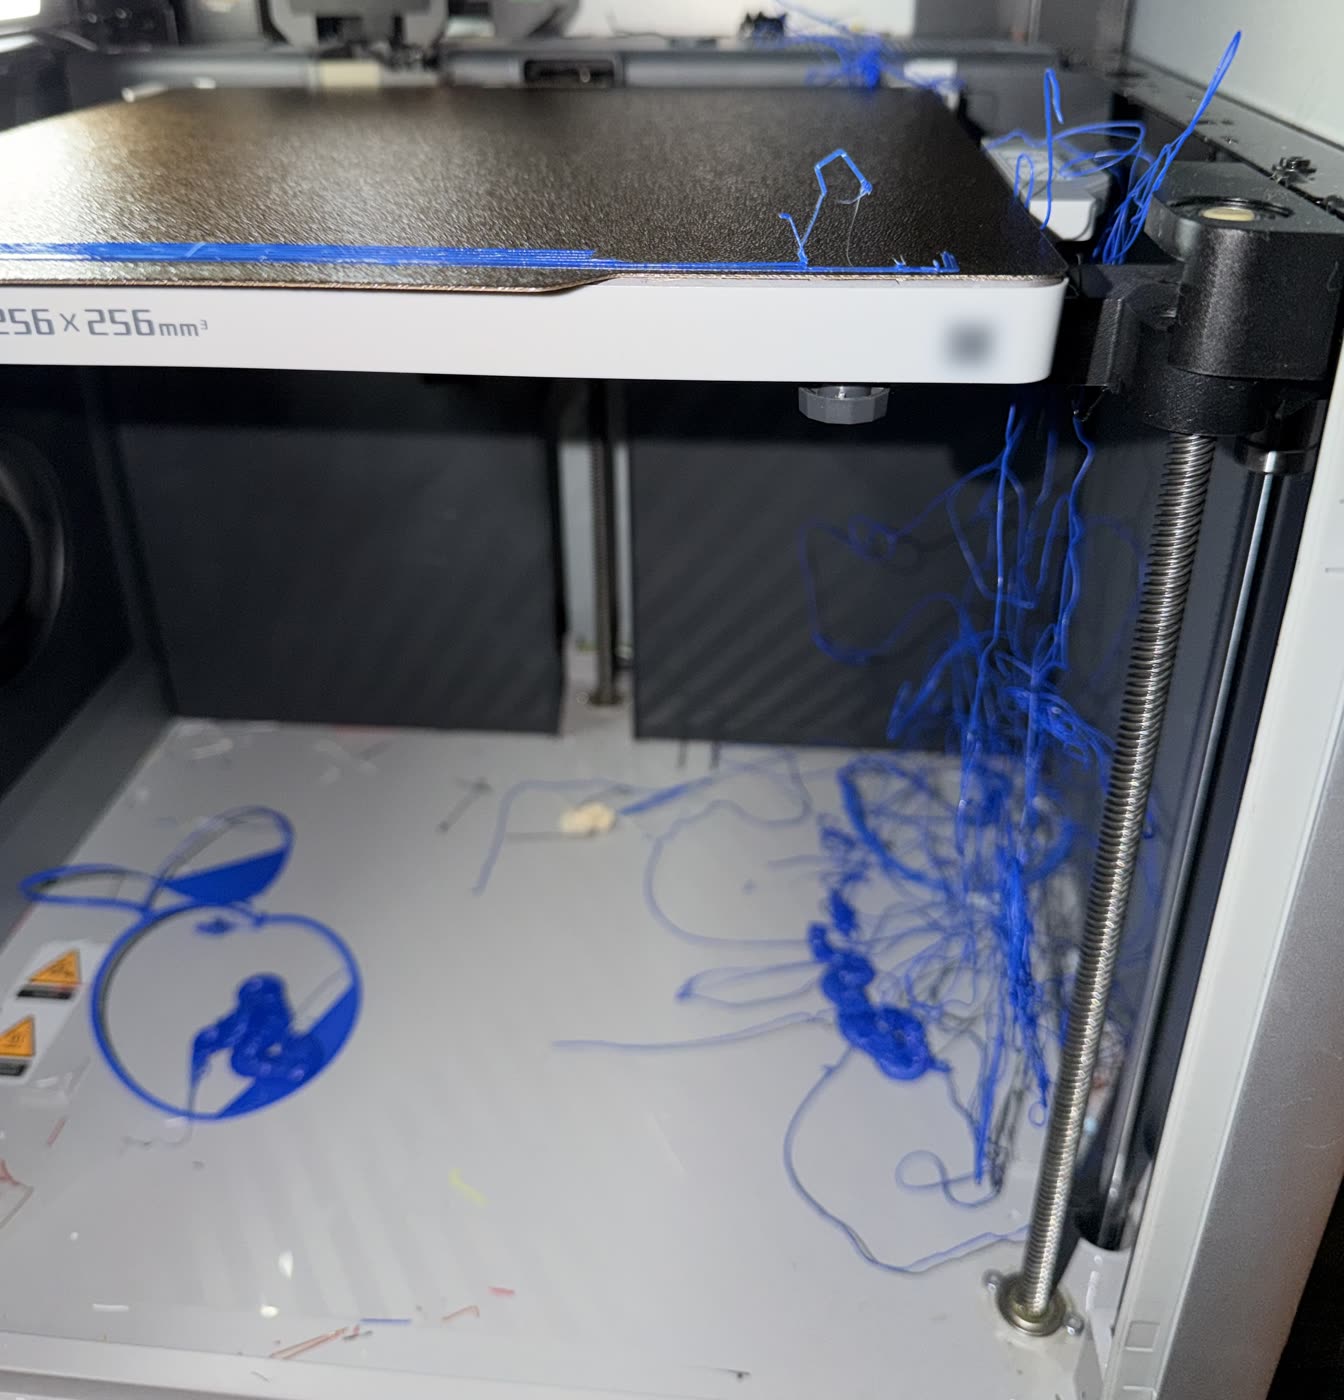
Its first quick test failed a third of the way in, at layer 25 of 75. All four test rings were knocked off and wrapped spaghetti around a Z screw.
They were 15 mm tall rings standing on feet only 3.2 to 4.4 mm wide, like a cookie cutter standing on its cutting edge. The contact area looked big, so they had no brim.
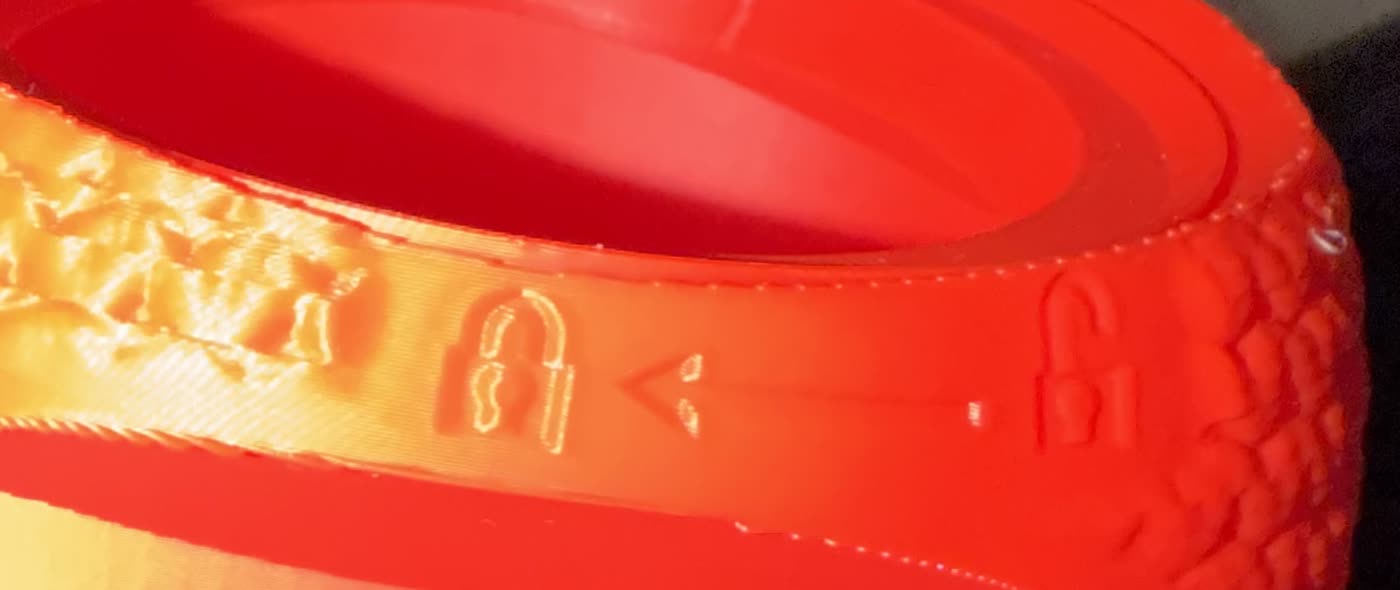
With peel-off brims and thicker walls, the second try printed fine. That test also chose the gaps for the red version. v7 got big engraved marks too: an open padlock, an arrow, and a closed padlock.
Mistake 5: the full-size lid was too tight
The red v7 set came out very hard to put in and to twist. The test rings had felt smooth. What changed?
The test rings were thin and flexed out of the way. They also printed slower than the real parts. A solid lid in a solid bowl gives nowhere.
By our estimate, overhangs drooping on the 45° roofs, plus the cone seat, ate about all of the 0.30 mm of room over the lugs (about three sheets of paper).
The next lid got far more room, and its test ring is made to try in the real printed bowl, not in a fresh test piece.
| Test rings (felt smooth) | Red set (too tight) | |
|---|---|---|
| Outer walls | 120 mm/s | 200 mm/s |
| Overhangs | 30 / 15 mm/s | 50 / 30 mm/s |
| Time per layer, at least | 8 s | 4 s |
| Stiffness | Thin 2 mm rings that flex | A solid lid in a solid bowl |
Mistake 6: the lid that got stuck
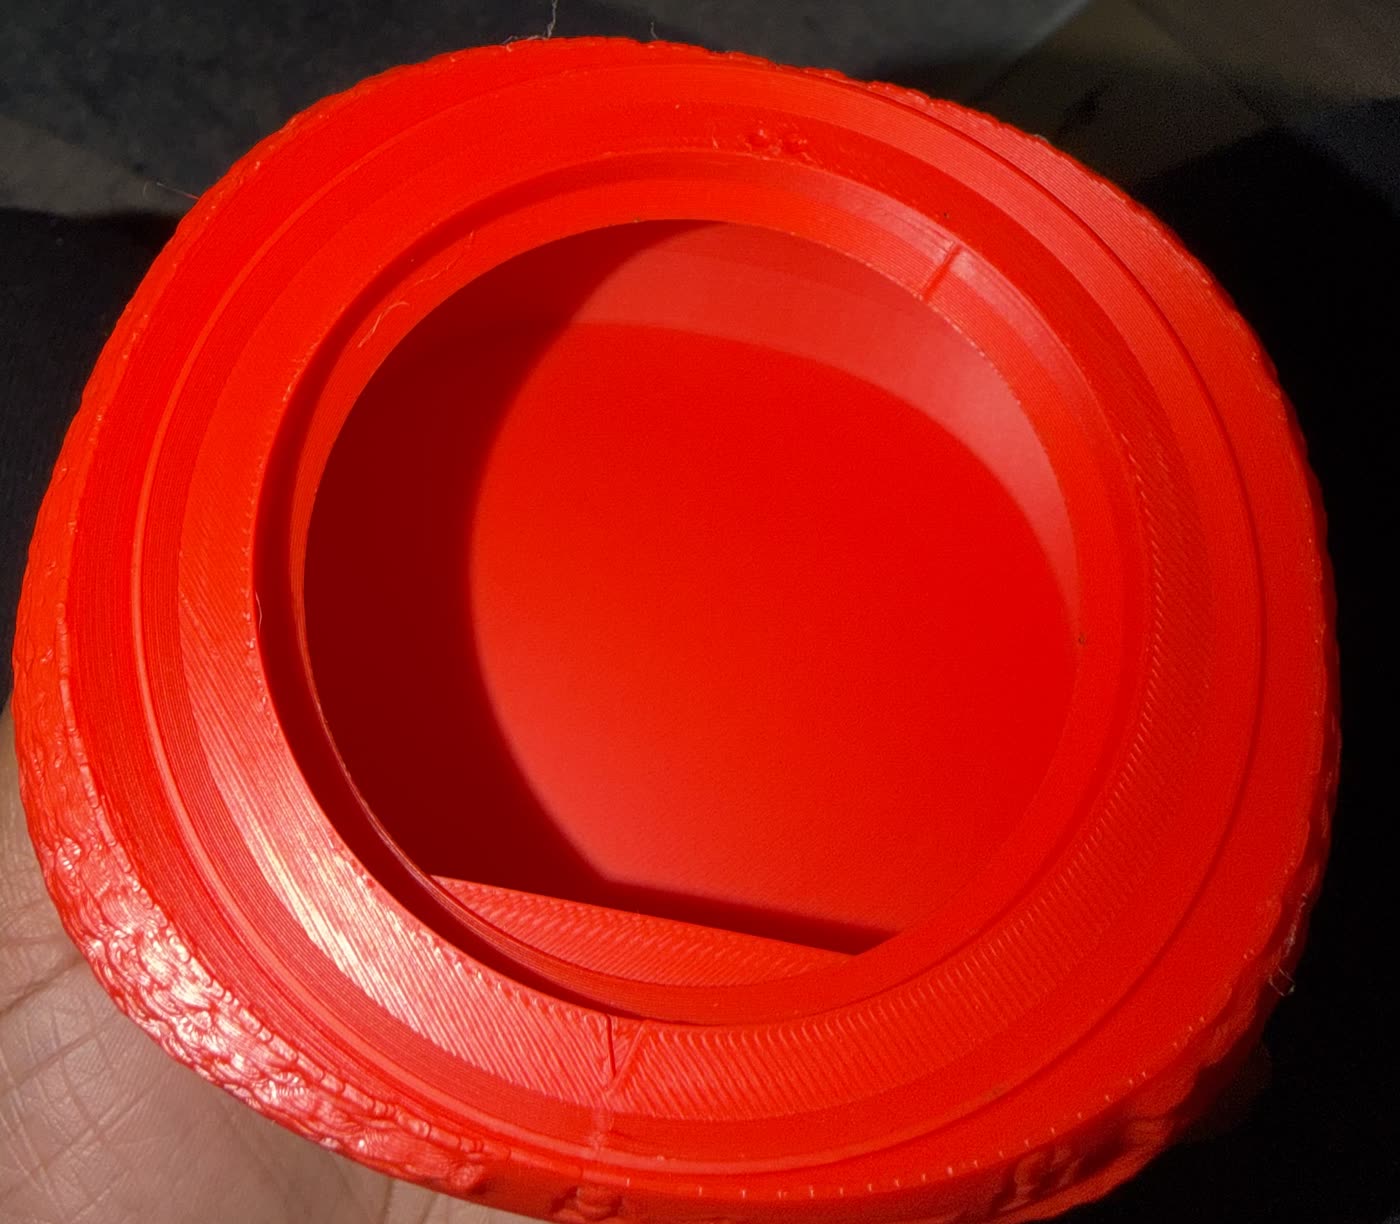
The red lid went in, locked, and never came out.
v7 had made the outside one smooth surface across the seam, so the finger groove from v5 was gone. The stalk was meant to be the twist handle, but its stud had already snapped (Mistake 7). There was nothing left to push or turn.
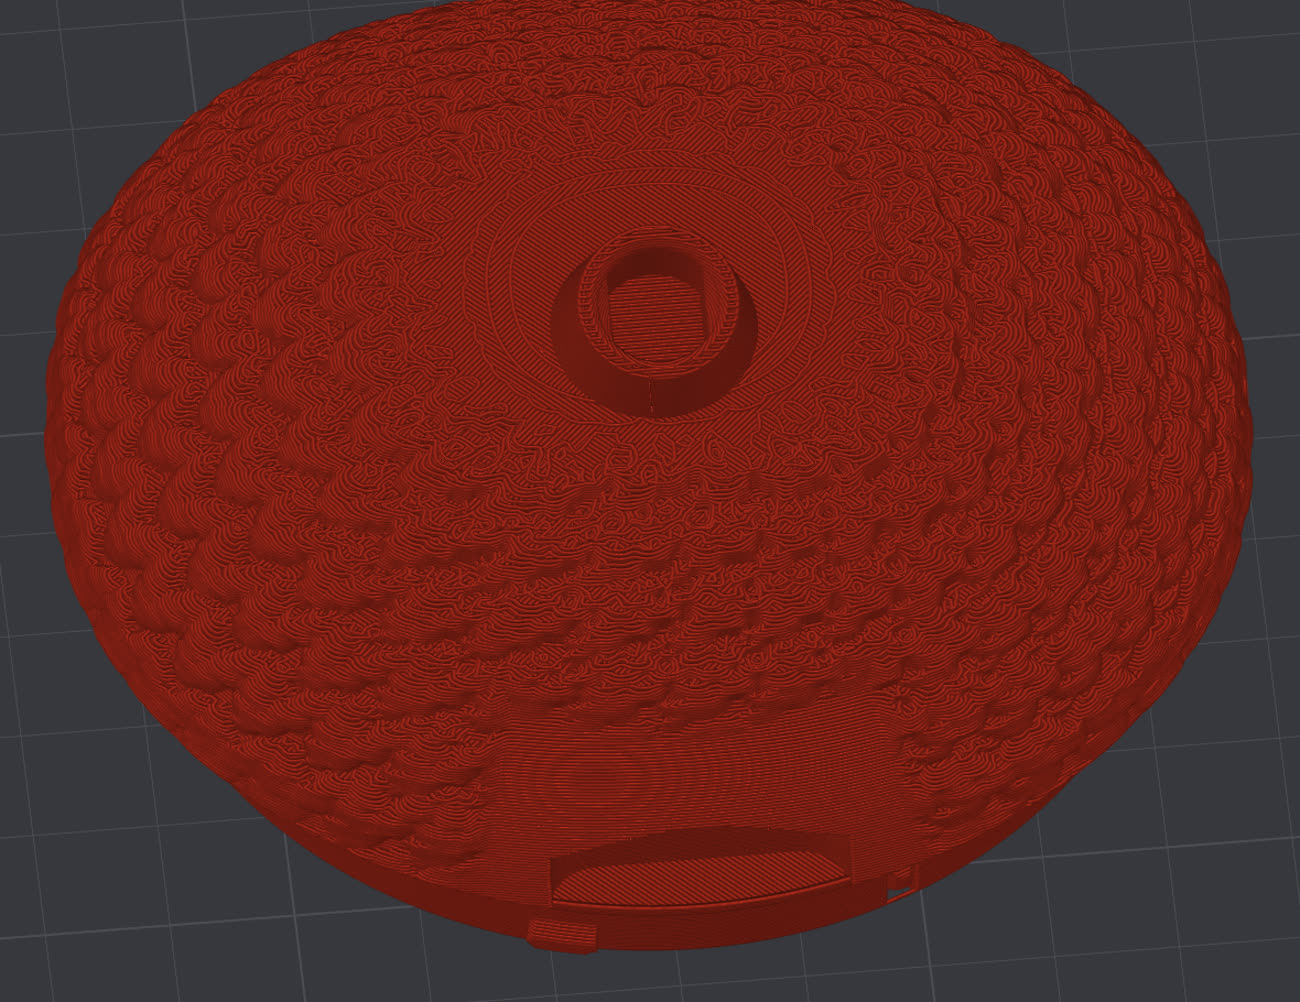
The fix is a grip notch at the back of the lid: a fingertip pocket 24 mm wide (about the width of a US quarter), 6 mm open at the surface, 7 mm deep, and 11 mm tall inside. Its roof rises inward at 45°, so it prints without support and a fingertip hooks up into it. Push its side wall to turn, then lift.
The old bowl still has its lid locked in it, so we printed a new bowl.
Mistake 7: the stud that snapped
The ball screwed onto an 8 mm stud printed standing up, as part of the lid. While screwing the ball on, the stud snapped off inside the ball.
Printed standing up, the layers stack across a stud like a pile of coins, and a sideways push splits the pile. That is the weakest direction of any print.
The fix: the thread became its own small pin, printed lying down, so its layers run along it like the grain in wood. It is an M9 thread (9 mm across, 2.5 mm per turn), printed solid, with a smooth waist where it bends most and a flat shoulder the ball tightens against.
In our model, a 30 N push on the ball (about the weight of a 3 kg bag) puts about 6 MPa on the pin’s waist, along its layers. The old stud took 19 MPa, across them: about three times as much, in its weakest direction.
The thread test
Two stalk tops and two ball bottoms, with the pin to screw into each. One dot is tighter, two dots looser.
One dot jammed: the pin went in and would not come back out. Two dots turned by hand. That is the fit we use now.
| Dots | Gap | About | Result |
|---|---|---|---|
| • | 0.20 mm | 2 sheets of paper | Jammed: would not unscrew |
| •• | 0.30 mm | 3 sheets | Turns by hand: the winner |
Mistake 8: a pin that could unscrew from the wrong end
The pin was threaded at both ends. Unscrewing the ball could unscrew the pin out of the stalk instead, and leave it stuck in the ball.
Now the stalk end is a double-D key: a 9 mm round bar with two flats cut on it, 7.2 mm apart: about as thick as a pencil. It pushes into a matching socket and can’t turn. Only the ball turns.
The ball end got a blunt start (opens in a new tab): the thin, half-formed first turn of the thread is cut off, so it can’t catch the wrong groove. A smooth 1 mm nose in front centers the ball before the thread meets.
Mistake 9: a pin in two pieces
The same night, the new pin came out of our build as two pieces: a 2 mm sliver of the key, smaller than a grain of rice, sat 4 mm away from the rest. One wrong line of geometry did it.
Both pieces sat on the plate, so our “is anything floating?” check passed it. We caught it by looking at the part in the slicer.
Our hand-over check now fails any part with a small separate piece in it.
What’s next
The new red bowl is printed, and the final lid with its keyed pin is printing now.
Next: twist a test ring in and out of the new bowl, push the pin into its socket, screw on the ball, and see if the whole box works. Part 2 will say whether it does.
| Version | What we tried | What happened | What we do now |
|---|---|---|---|
| v2 (white), Oct 31 | Snap lid, ridges all round | Could not be opened | Round lids twist |
| v3 rings, Nov 1 | Softer snap ridges | Still pried off with fingers | Test the joint as a ring first |
| v4 trays, Nov 1 | Twist lock, 3 click strengths | All three twist | Firmest click wins |
| v5 (blue), Nov 1–2 | Lugs on spring arms | Pulls out when locked | Lugs on solid plastic |
| v6 (black), Nov 2 | Flat step at the seam | Would not go on | No flat overhangs at a fit |
| v7 test, Nov 2 | Thin rings, no brim | Knocked off at layer 25 | Brims on narrow feet |
| v7 (red), Nov 3 | Flush lid, standing stud | Tight, snapped, stuck | Full-size tests, a grip notch |
| Thread test, Nov 3 | Pin lying down | 0.30 mm turns by hand | Threads lie down |
| v7.4, Nov 3 | Notch, more room, keyed pin | Printing now | One-piece check |
What we do now
- Every box lid needs a finger-grip notch, designed with the lid: about 24 mm wide and deep enough to hook a fingertip.
- Round lids twist, they don’t snap. Locking lugs stand on solid plastic; the click gets its own arm.
- A ring stands on its narrowest band: a foot under 6 mm wide on a part more than 2.5 times as tall gets a peel-off brim.
- Full-size parts bind tighter than small test pieces: test at the real size, stiffness, and print settings, against the real printed part.
- Twist locks: budget about 0.3 mm (three sheets of paper) of print error on every gap that faces an overhang.
- Threads print lying down, as their own part, with a shoulder stop. Our printed M9 thread needs a 0.30 mm gap.
- Every printed part must be one piece: check it in the slicer, not just in the picture.
- Space fit-test steps far enough apart to feel, and mark every one with dots.